Home Renovation: Pet Edition

petoskeyplastics DIY Advice, Home Improvement, Painter's Plastic, Painting

Home improvement isn’t just for humans! If you’re a DIY lover with a spoiled pet, it’s time to pamper your furry friend with their very own space. A pet area doesn’t need to be an entire room: a nook or corner will work just as well. Your pet will be thankful for a nice place of their own.

Here are six steps for designing a cozy space just for your pet.

Pick a location. This crucial step will be dependent on your home and your pet. Pick a spot where your animal will be comfortable and cozy — everyone wants to feel safe when they nap. If your pet already has a favorite spot that you’re willing to upgrade, go for it! Otherwise, areas like an unused corner of a living room, bedroom, home office, or basement are great places to do this project. Pick a bigger area if you’ll have more than one pet sharing the space. You’ll also want to consider if your pet likes to be close to the action or further away.

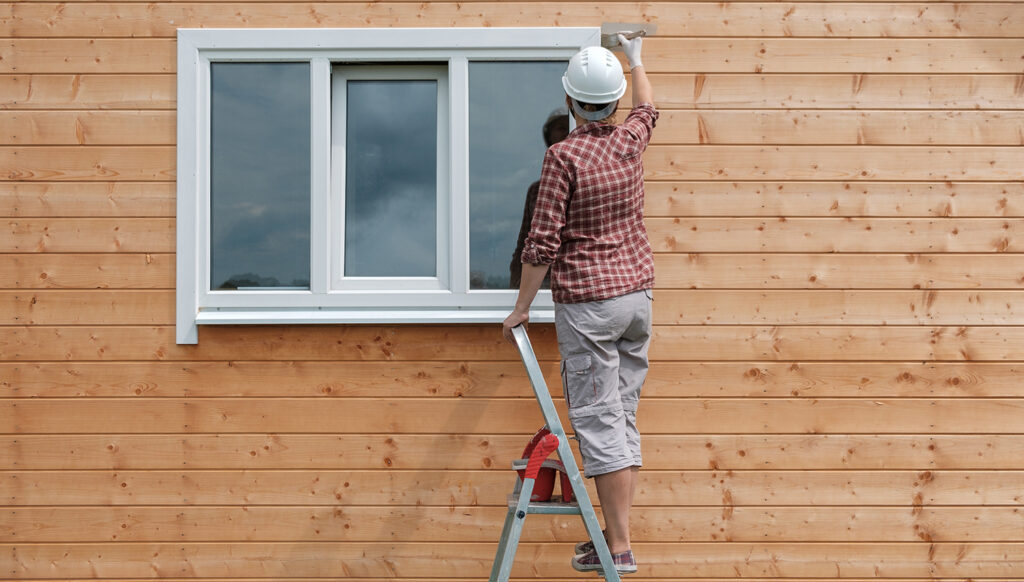
Paint. Once you’ve picked the perfect spot, it’s time to make the space unique. Although pets often don’t see color the way we do, they still deserve a little pizzazz. You can choose colors that match their fur or find the same shade as their favorite toy! Be mindful of the type of paint you use; there are many animal-safe and nontoxic options to choose from. Let the paint dry completely and wait a few days for the fumes to disperse.

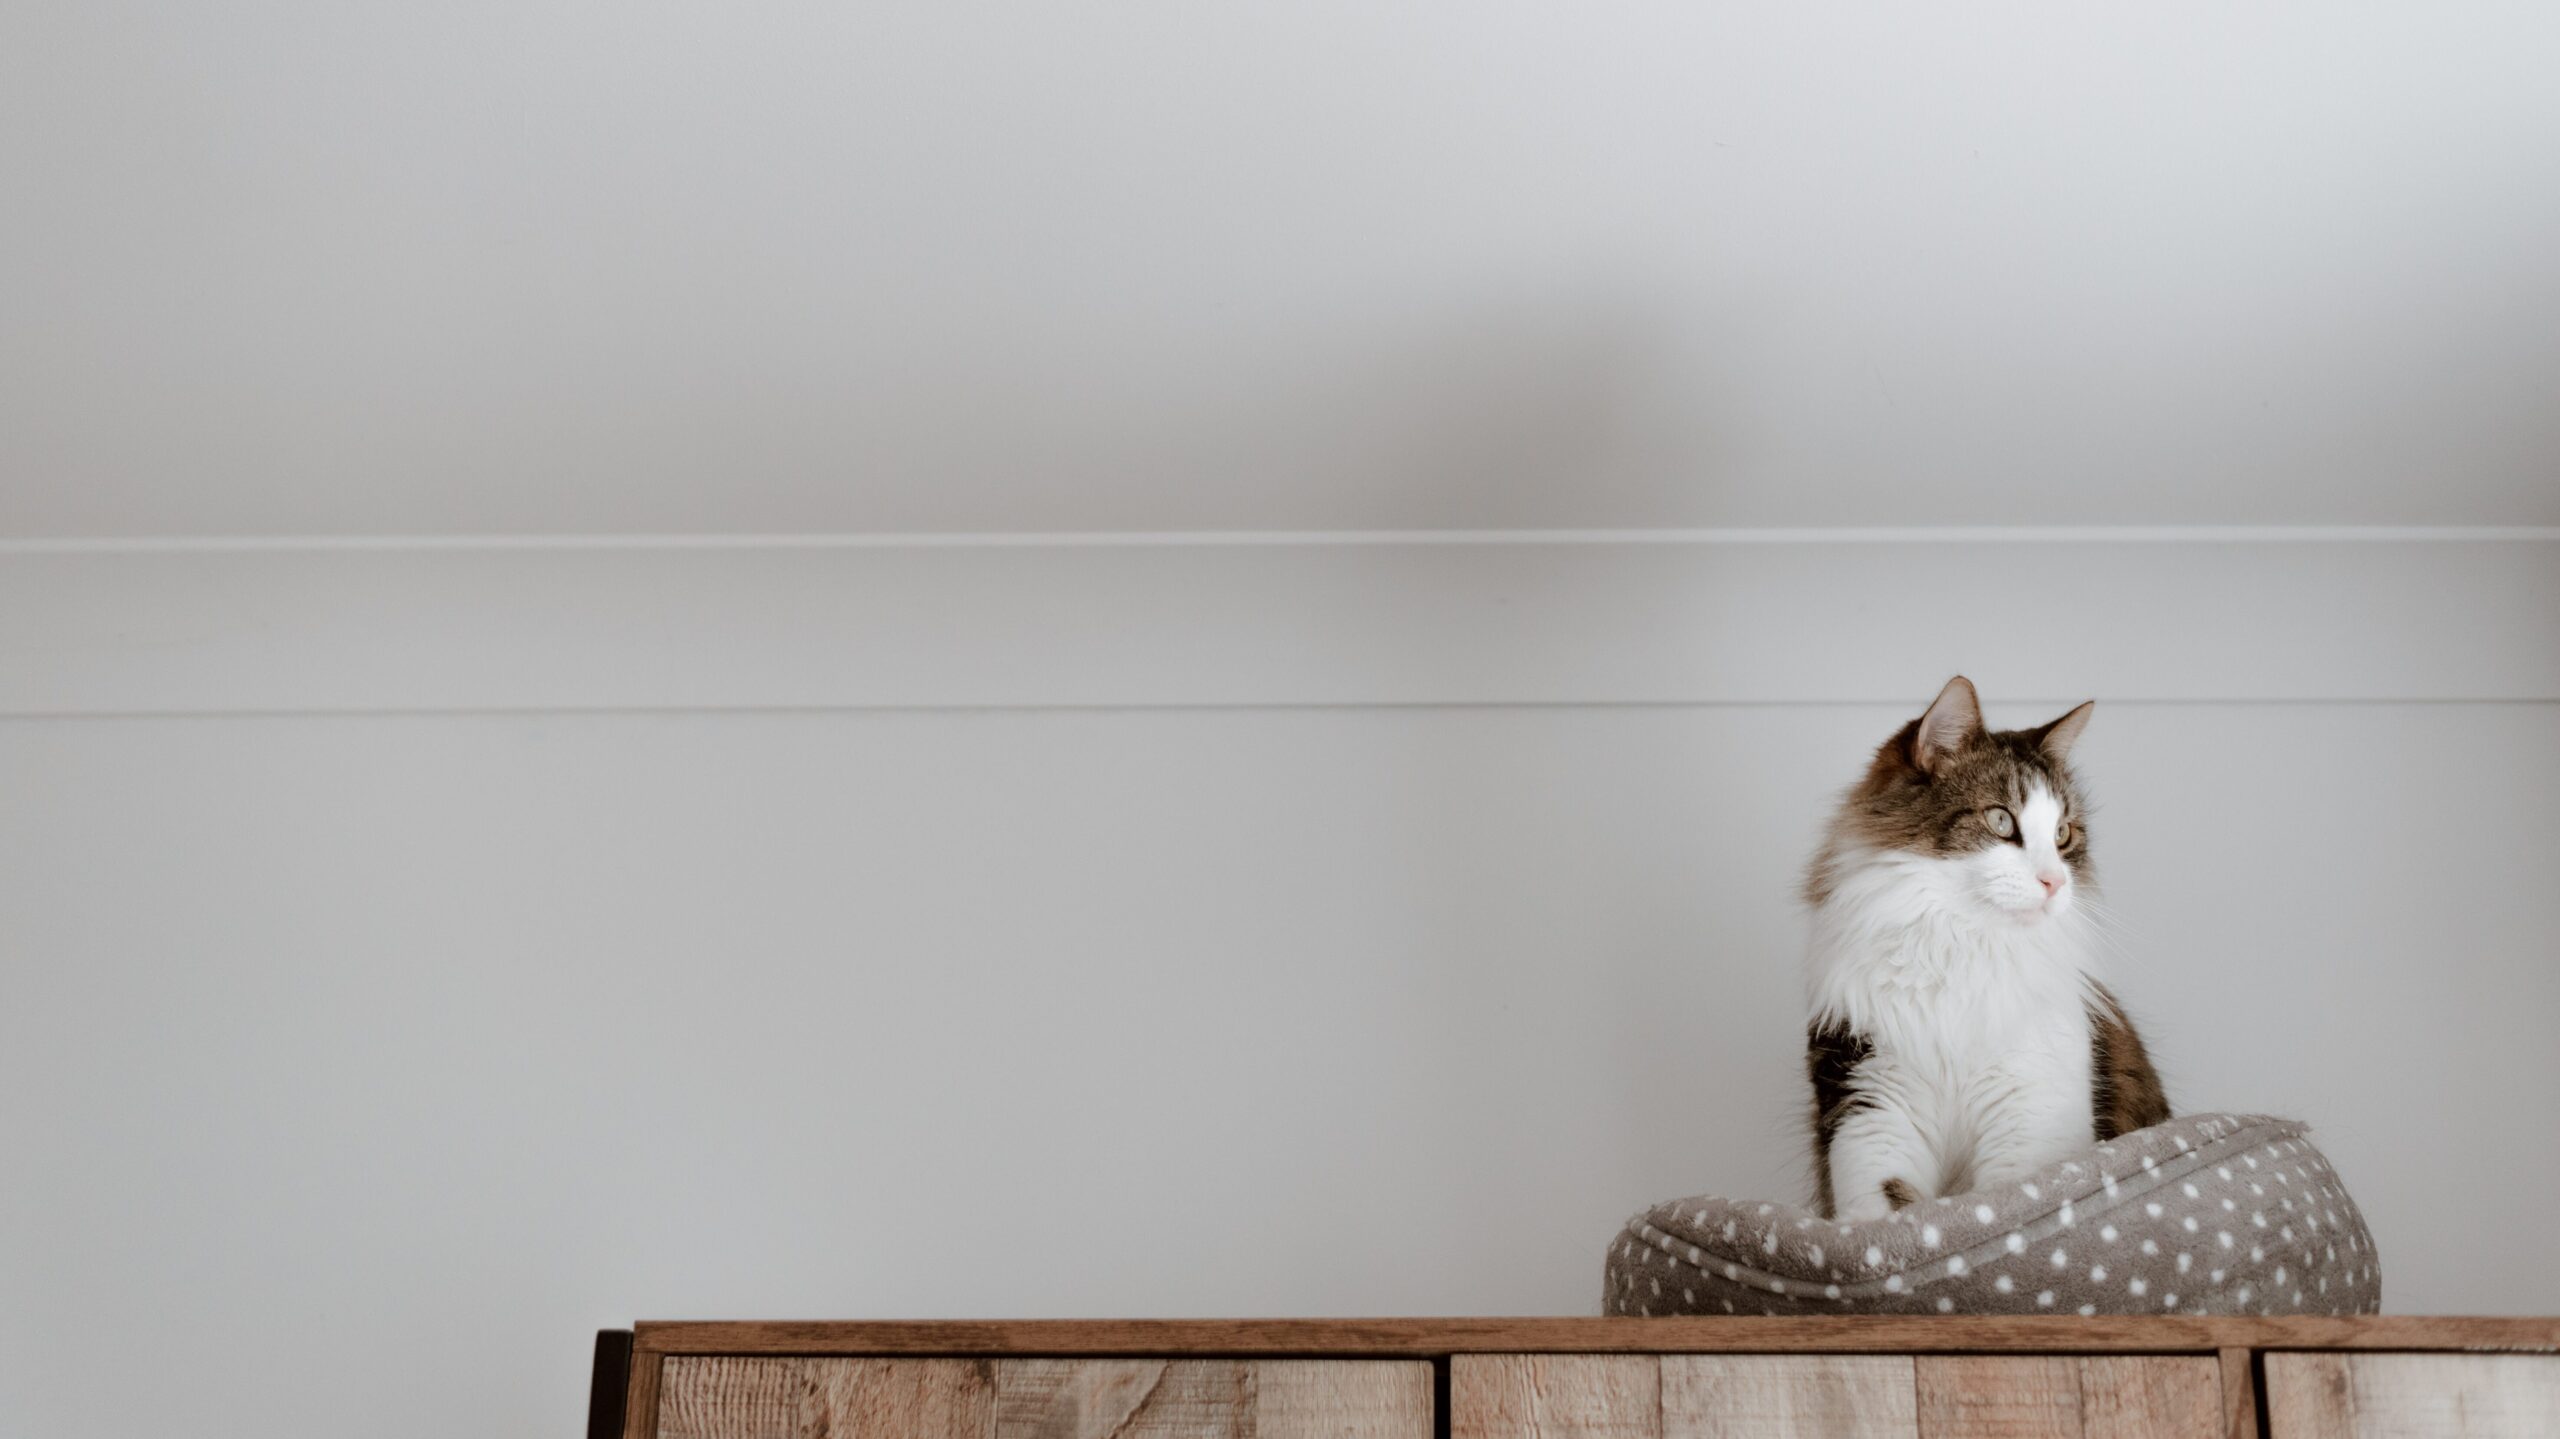
Decorate. Add in a pet bed or crate for your furry pal to relax in. Most pets sleep a lot during the day, so a good snoozing space is essential. Next up, add in your pet’s toys to keep them happy and busy. If you are adding food and water to the pet area, now would be the time to do so. Don’t forget a nice mat to keep the floors safe from water spills and kibble. If you have a particularly fancy pet, you can add photos, decals, or art to the walls. Make sure these additions won’t get torn down or chewed up.

Check for safety. If you put your furry friend’s hideout in a laundry room or garage, make sure they can’t get into anything dangerous. Move floor-level items up onto shelves or tabletops to avoid any accidents! If there is no heating or air conditioning in their new space, you should consider investing in temperature solutions for the extremely warm and cold months. Safety gates and pet webcams can both be great additions to your pet’s space.

Final touches. Your mini renovation is almost complete! Add in a storage area to keep food, treats, and grooming supplies. Hang up any leashes or harnesses that your pet uses. Lastly, clean up any remaining debris or mess.

Move-in. See how your pal likes their new spot! As your pet settles in, you can cross this project off your home improvement to-do list.

How can Steelcoat® help you make the pet room of your dreams? High-Density PE Painter’s Plastic will keep paint where it belongs and off of where it doesn’t. Our Low-Density PE Plastic Sheeting will cover and protect your floors and furniture while painting and renovating.

For more home improvement and renovation ideas and tips, stay up to date with our blogs by following us on FacebookLinkedIn, or Twitter!

Great Ways to Increase Your Home’s ROI in 2021

petoskeyplastics DIY Advice, Home Improvement, Remodel

Garage door replacement ranks #1 when thinking about the highest ROI repairs that can be done for a home.

Home remodeling was a steady trend before the pandemic, and it hit new heights while everyone was staying home. Although many homeowners and renters have made renovations already, there still might be a few key changes that will help your home’s return on investment (ROI).

Remodeling Magazine’s 2021 Cost vs. Value report places a garage door replacement at the top of your to-do list. Often a garage can be a big part of a home’s first impression. An updated, functional door will certainly do wonders. Following closely behind is adding a manufactured stone veneer. Siding can also make or break a home’s look; buyers like artificial stone siding to add a bit of texture to the house. Third, on the list is a minor kitchen remodel. A great kitchen is a must-have for many, so what can you do for “minor” renovations? Consider installing kitchen cabinets, adding touchless faucets, or giving the room a warmer color.

The yearly Cost vs. Value report “tracks the ratio of value over cost for 22 common remodeling projects.” The 2021 list covers indoor projects like kitchen remodels (minor and major), bathroom remodels and additions, and master suite updates. The report also features external suggestions for window replacements, entryway updates, and deck additions.

These big tasks can recover most of the cost and increase your home’s value on the market. Outside cosmetic fixes on your home will help you bump up curb appeal, while internal updates will make buyers fall in love during home tours.

You can recover about 94% of the cost of replacing your garage door or around 92% with a manufactured stone veneer. A minor kitchen remodel lands around 72% of the cost recovered. Don’t worry about getting started on these projects, though. The Steelcoat website posts many helpful how-tos like picking a paint color or preventing paint from bubbling.

Whether you’re a professional in this industry or not, remodeling projects always yield some type of mess. Make sure to check out the Steelcoat® line of products before you jump into any home improvement endeavor to help keep your workspace clean and protected! For more ideas and tips, stay up to date with our blogs by following us on FacebookLinkedIn, or Twitter.

How to Use Trash Bags for your Move

petoskeyplastics DIY Advice

Moving can be stressful, but there is a product in your house that can make it a lot easier. Trash bags are a versatile and cost-efficient resource that can help you save time during your move.

Here are a few ways to pack like a pro with trash bags.

Cover clothing. Instead of taking all your shirts and pants off hangers, folding them, and stuffing them in boxes, just group a section of your closet and put the clothes in a trash bag. There are two ways to do this. The first way is to keep the clothes hanging and pull the trash bag up around them. Then, stretch the ties around the hanger to keep the bag up. This method works best for shirts and other short articles of clothing that won’t bunch at the bottom of the bag. The second method is accomplished by poking a hole in the bottom of the trash bag and sliding the bag down the clothes to imitate a garment bag. This way will allow longer pieces of clothing to stick out of the bottom and avoid wrinkling. Either way you choose, your clothes can go back into the closet of your new home with minimal effort

Gather garments. For all your other pieces of clothing that aren’t hanging up, you can put those in a trash bag too. Bagging socks, pajamas, and belts reduces the number of boxes you will need. Group your clothes accordingly, and don’t forget to label! When it is time to load up the moving truck, the trash bags will be easier to pack compared to bulky, rigid boxes.

Store shoes. Figuring out how to pack up footwear is a pain. Have a designated shoe bag instead of spending time trying to fit all your pairs into boxes. Bagging your shoes will keep all the dirt and grime on them off your other belongings.

Load up linens. Lightweight blankets, sheets, towels, and pillows only need to be folded and put in a trash bag. After a long day of moving, you will be glad to have all your linens in an easily accessible place.

Transport toys. You don’t need to spend your time splitting up small items like toys into different boxes. Keep all toys in one bag to avoid having to root through multiple boxes later on just to find one specific toy.

Pack plants. Another hassle of moving is making sure your plants make it to your new home safely. You can use smaller bags to cover the pots and keep dirt and soil from spilling. Be mindful to only bag the pots and not the whole plant to avoid damaging leaves or restricting airflow. Use larger bags to act as padding between plants and avoid damage to breakable pots from bumpy roads.

Protect plates. As with your plants, you can use trash bags to protect your dishware by placing smaller bags between plates. This cushioning will keep your plates from rubbing against each other and creating scratches. You will be happy to avoid chipping and cracking with this simple step. After you’ve unpacked, reuse any trash bags that are in good condition.

Don’t trust just any trash bag to get the job done — use durable and strong Steelcoat trash bags to ensure your belongings make it to their destination safely. To meet your needs, Steelcoat trash bags come in a wide range of gallon sizes. Our product line starts at the smallest 4-gallon bag all the way up to our extra-large 55-gallon drum liner. Closure types include the standard drawstring, twist tie, and flap tie.

For more ideas and tips, stay up to date with our blogs by following us on FacebookLinkedIn, or Twitter!

DIY Summer Slip and Slide with Steelcoat Sheeting

petoskeyplastics DIY Advice, Seasonal

Summer is here, which means it’s time to break out sprinklers, pools, and slip-and-slides. Instead of going for a costly product, try creating your own slip-and-slide for an extra-long and extra-fun experience. You’ll never want to buy another slip-and-slide after you read just how easy they are to make!

Where to start?

Location. Find an open area or hill that you can set up on. Once you have your location set, then you can start preparing to create your slip-and-slide. 

Supply run. You’ll need thick plastic sheeting to act as the slide. We recommend our 4 mil or 6 mil sheets that can come in a variety of lengths! Next, add some sort of stake or pins to your shopping list. A few pool noodles are optional but recommended. And finally, you’ll need some tear-free shampoo and a water source.

Set up. Unroll your sheeting and decide on the length and width you want the slide to be. Ensure the space is clear of any sticks, roots, or debris that could cause harm the anyone enjoying the fun.

Pool noodles. If you want to add a barrier between the sheeting and the grass, you can roll pool noodles into the side to act as a bumper. Doing this will keep more water on the sheet and hide the pins you will use to secure the sheeting. A pool noodle can also get added at the end to help the sliders slow down

Stake. To keep the sheeting from moving around or getting bunched up, use garden pins or stakes to secure it to the lawn. Make sure that the stakes are completely hammered down so they do not cause any injury. Put the stakes through any pool noodles you might have added to avoid anyone sliding over them.

Slip. Set up your water source like a hose or sprinkler to run down the sheeting. Make sure the entire surface is covered in water. Add tear-free shampoo to act as a lubricant that will help the sliders on their way down.

Slide. Do some test runs and fine-tune. Now you’re ready to enjoy the rest of the day! Consider adding inflatable tubes or boogie boards to make the slide even more fun.

For more ideas and tips, stay up to date with our blogs by following us on FacebookLinkedIn, or Twitter!

Bursting Paint Bubbles

petoskeyplastics DIY Advice, Home Improvement, Painter's Plastic, Painting

Bubbles. Once a word correlated with happy summer memories, now attached with the frustrations of painting. The occurrence of a bubble, also called a blister, is an annoyance that can take any paint job from a weekend DIY project to a much more labor-intensive endeavor. It is time to say goodbye to paint bubbles and get ready for great painting projects. We have broken down what causes bubbles to happen, how to fix them, and how to prevent them in the future.

How do paint bubbles form, and why do they happen? A bubble forms when the paint stops sticking to its base, whether it be a base coat of paint or a building material like wood or drywall. The paint pulling away allows air to get in and form a bubble.

As for why they happen, there are many answers. One easy fix can come down to paying attention to the weather.

Bad weather is the culprit behind a vast majority of paint bubble occurrences happening outdoors. It is best to avoid painting within hours of a storm, as the rain and moisture present in the air during this time can do a fair amount of damage. Painting before a storm can allow moisture to penetrate the paint’s surface before it has completely cured. Attempting to paint after a storm can cause moisture to get trapped underneath the new layers. Either way, avoid bubbles by doing a rain check.

Bubbles can also be caused by failing to properly prep your surface correctly. Any type of dirt, grease, or moisture can be the perfect formula for paint separation. A dirty surface means the paint can’t adhere properly and will pull away from the base. On top of that, a lack of primer can also be a culprit. Without the primer, the base layer of paint can get absorbed into the surface and cause additional layers not to stick. It is best practice to ensure that the designated area has been cleaned, dried, and primed before application occurs.

Once paint bubbles have formed, what’s next? How are they fixed? In all honesty, the best thing to do is to scrape off the affected area and start over. Make sure the surface is smooth to a point where you cannot feel a difference between the painted and bare surfaces. Double-check that any pits are filled, and you are ready to prime and paint just as you had before. As long as you have correctly prepped the area, you should end up with a smooth, bubble-free surface! If you are looking to avoid any additional painting, you might be able to iron out the bubble. If you go this route, we recommend using online resources to learn how to perform this method properly and safely.

The main takeaway is that preparation is essential to avoid bubbling. Always check the weather before starting an outdoor project, and always clean any surfaces you are about to paint. Now that you are ready to avoid bubbles, it is time to start planning your next home project. Our guide to picking an exterior paint color is a great place to start.

Don’t let stray paint ruin a project. Protect your surroundings with Steelcoat High-Density Painter’s Plastic, which uses Grip-N-Guard technology to cling to any surface. You’ll be able to paint worry-free.

Five Ways to Keep Your Job Site Clean

petoskeyplastics Home Improvement, Industry, Remodel, Seasonal, White Page

Original: https://www.steelcoatproducts.com/steelcoat-white-page-five-ways-to-keep-your-job-site-clean/

Despite the understandably cluttered nature of construction and renovation jobs, a good contractor knows that keeping the job site clean is a priority. A construction site that lacks organization can be messy and dangerous for workers and anyone else around the area. By ensuring that a site is as clean as possible, post-construction clean-up becomes faster, easier, and safer.

Clean up regularly– Cleaning regularly is one of the best ways to maximize efficiency and safety on your construction site. Because of the nature of construction, things are going to get messy. However, taking a few minutes to clean up after one task before moving on to another means less clean-up at the end. It also minimizes the materials onsite that could cause accidents or injuries. 

Make safety a priority– A job site can quickly become dangerous if there is a lack of order and organization. When there is no set cleaning routine, potentially harmful materials like nails, sharp tools, and hazardous debris can be left lying around. It is important to take care of those items and tools as you go. Inform your team on what their role is when cleaning up and encourage them to tidy their supplies and area before moving on to a new task. Additionally, having an employee on the site in charge of general clean-up can help keep the area safe and the project on track.

Cover furnishings and floors– If the construction site is inside a building like an office or home, covering furniture and floors can prevent most renovation mishaps. For example, using our Steelcoat® Painter’s Plastic and Plastic Sheeting to protect surfaces like floors and furnishings can prevent paint and dust from getting onto them during the renovation. This small action can boost your professional image and increase your client’s satisfaction with the job.

Have multiple waste disposal areas– If the job site is small, like a one-room renovation, then having a few clearly marked containers for waste would be sufficient. If the job site is much larger than that, make sure that you have many clearly labeled waste disposal containers and areas throughout the construction site. This is an important step in keeping the job site safe and clean. It should be simple for employees to recognize where to put recycling, trash, and scrap material. The disposable areas should be easily accessible to avoid having people walking across the job sites to discard waste from their tasks. This not only helps avoid accidents by preventing too many people from walking around, but it also increases efficiency. Convenience and simplicity are key when it comes to keeping waste taken care of at job sites.

Hire a reputable contractor– If you are not a contractor and are looking to hire one, make sure you hire someone known for being responsible and professional. Any good contractor will know and understand how important a clean job site is. It is a smart practice to research your contractors and shop around so you can pick the best one for your job. Utilize networks online and in your life to find which contractors have done good work for others.

Steelcoat® Products is a division of Petoskey Plastics that serves multiple markets in the construction, home improvement, and retail industries. Our combination of innovative design and technology with specialized engineering makes our wide variety of products some of the best in the market. Steelcoat® Products include painter’s plastic, plastic sheeting, contractor bags, trash bags, can and drum liners, and much more. Steelcoat® Products also offers additional private label solutions for our customers. Learn more at steelcoatproducts.com.

Choosing the Right Color for Your Home Exterior

petoskeyplastics DIY Advice, Home Improvement, Painter's Plastic, Painting, Seasonal

You have a great-looking lawn, a beautiful garden, and gutters that can keep up with the rainy season. Now, it is time to give your house the final touch-up that it needs. Updating your home’s accent color is a small change that can sometimes have more of an impact than painting the entire house. How do you pick the perfect accent color, though?

Here are eight steps to help you find the right look for your home.

Choose what you’ll be painting. Do you just want to stick with giving some flair to the front door, or are you adding shutters and trim to the list? Once you know what you plan on painting, you can make better decisions about color choices.

Find your brand. Before you have your heart set on one color, look at the benefits that different brands offer. You may need weather-resistant paint or paint made for metal surfaces. Glossy, semi-gloss, or matte sheen options are also worth inspecting.

Pick a shade. Help yourself by narrowing down if you want something light, dark, or in-between. If you’re hoping to brighten up your property, then you may already have your heart set on a light color. If you’re looking for something more reserved, you might know that a deeper shade is right for you. Once you have made this decision, you can have an easier time picking the exact color for your house.

Match your style. Consider the current colors of your house’s siding and roof, along with any brick, stone, or wood accents. Finding the undertones of these materials will help you decide which accent color options will achieve the most balanced look. Also, consider your internal design choices. The color of your living room might be the perfect color to bring outside. Color theory and design guides can help you make your perfect pallet; a quick search will help you plan. 

Take notes from nature. While considering the colors of your home, also look at the surrounding elements. Are there any colors in your garden that you would like to recreate? Or, maybe, you’re hoping to blend in with the trees. Find inspiration anywhere in and around your home.

Color visualizer. Technology now allows you to virtually test different colors on your house. This is great for helping you visualize how a color may look on a larger scale than just a paint chip. Using this technology can help you narrow down your top choices before buying paint samples.

Test it out. Once you’ve settled on a color, get a sample-sized can and paint a small area. Leave it up for a few days to confirm that you like the color before buying more. Take note of how the color appears during various times of the day or during different weather conditions to see the full range of possible looks.

Paint. You’re at the final steps now that your color is tested and approved. Clean and repair the surfaces you will be painting before you prime. Find a day with mild weather to get your painting done. Painting while it is too hot can cause the paint to dry too quickly and clump. On the other hand, painting while it is too cold can cause peeling. Don’t forget to use painter’s plastic to protect the areas you don’t want to paint.

How can Steelcoat® help? High-Density PE Painter’s Plastic will keep all of your paint where it belongs and off of where it doesn’t. Our Low-Density PE Plastic Sheeting will cover your porch or any other spots you want to keep clean while painting.

Thanks for following along with our spring exterior home improvement blogs. Stay tuned for future series and updates. Follow our socials on FacebookLinkedIn, and Twitter.

Springtime Gutter Cleaning

petoskeyplastics DIY Advice, Home Improvement, Seasonal, White Page

Your next step to a great exterior is giving your gutters a check-in. Gutters can go through a lot of wear and tear in the fall and winter, so it is a good idea to make sure they’re ready to handle the spring rainstorms.

Here are six steps to get your gutters prepped for spring.

Rainy day check. Wait for a rainy day to see how your gutters are performing. This litmus test will give you a better idea of how clogged your gutters may be or what type of damage they have. If they are overflowing and not draining properly, there’s a good chance that there are dead leaves and other surprises in your gutter system. Also, check the downspout to see if water is correctly exiting the system. Gutters can sag and pull away from the boards, so look for these issues as well.

Decide course of action. Now that you’ve assessed your gutters, you need to decide if they need cleaning or if it is time for a replacement. Do your research to find a trusted professional to install your new gutter system.

Clean out debris. Wait for a dry day to clean out your gutters – you don’t want to deal with soggy, dead leaves. You may just need your hands or a leaf blower to clear everything out. If your gutters are really clogged, there are special gutter cleaning tools for you to invest in. Professionals suggest starting near the downspout and working your way towards the closed end of your gutters. Always be safe and careful when dealing with a ladder or being on a roof. Practice precaution and stay alert.

Flush with water. Once all of the gunk and junk is out, take your garden hose and clean up the dirt and left-over debris. Doing this clears out anything left behind. This time, start from the closed end of your gutters and end with your downspout.

Make repairs. Now that everything is clean, you can inspect for any small repairs that need to be made. Caulk any holes or manage any rust you find. Tighten up any areas that are coming loose or sagging. If you are noticing multiple issues, it might be best to call in a professional to repair or completely replace your gutters.

Mark your calendar. If you live in an area with a lot of tree coverage, it is a good idea to clean your gutters on a more frequent basis to prevent any damage. Leave yourself a note to check back in on your gutters in a few months.

How can Steelcoat® help? Our quality Trash Bags and Contractor Bags collect all of the gunk you get out of your gutters. Our Low Density PE Plastic Sheeting is easy to lay down on your lawn under your gutters to prevent any debris from falling into your garden or grass. 

Next week we will be posting the last installment of our spring exterior home improvement series. Get ready for some great tips on giving your house a new coat of paint. Follow us at Steelcoat Products to see all our updates.

How to Prep Your Garden for New Plants

petoskeyplastics DIY Advice, Home Improvement, Seasonal, White Page

Now that you’ve spent some time on your lawn, it’s time to move focus to your garden.

Before you decide what you’re planting this year, you’ll need to clean up your flowerbeds and manage any existing vegetation. Clearing this area up will help prevent weeds and keep your garden looking its best. Make sure to add any organic waste to your yard waste or composting bins.

Here are 11 steps to get your garden growin’.

  1. Wait for warm weather. The best time to give your garden its spring makeover is when the weather is above 50 degrees Fahrenheit for a week straight. Along with this, you’ll want to wait for your garden to be thawed and dried out before you start your work. Starting too soon could cause the soil to get too compact and hinder new growth.
  • Check for bugs. Be conscious that many insects that are beneficial to the ecosystem may be using your garden as a shelter until warm weather. It would be best to look up what bugs may be in your area and learn how to properly clean your garden while allowing them to still emerge in a few weeks.
  • Get rid of thick layers of leaves. It isn’t necessary to remove all the leaves from your garden because they help the soil as they decompose. It is a good idea to clean up areas with too many leaves, though, as these areas can attract disease. Any mulch you add later can be added on top of the leaves you leave.
  • Remove winter mulch. Take out any winter mulch you applied so you can apply a fresh layer after your planting is done.
  • Weed. Get rid of any weeds you see while their roots are still shallow. For any harder-to-manage weeds, you may need to purchase weed killer.
  • Pull any annuals from last year. These plants do not come back after winter and need to be taken out of your garden. Make sure you get all of the roots and make room for any new plants you may be adding. 
  • Get rid of dead veggies. Along with weeds and annuals, you’ll need to remove any leftover vegetables from last year’s garden. Try not to leave anything behind so you will have growing space for your new crop of vegetables.
  • Remove dead leaves or branches from perennial plants and shrubs. These plants come back year after year and will need some care after the winter. Prune branches or remove any dead leaves on these plants. Be mindful of new growth while trimming — you do not want to cut off any yet-to-bloom buds. This is the time to trim back any overgrown shrubs or vines. As you would expect, each plant will likely have different needs, so we recommend doing your research before your get to trimming.
  • Plant. This step is entirely up to your vision. Find those flowers you love or the veggies you need and get them in your garden. Don’t forget to stake anything that might need help growing upwards. Just fasten your plants gently with some plant ties to give them extra support.
  • Fertilize. Depending on what type of plants you have growing in your garden, you may need different types of fertilizer. This would be another step where you will need research your specific plants and what is best for them.
  • Edge the garden. Grass is great in your yard, but you don’t want it creeping into your garden. Edging is the process of establishing the shape of your garden. There are many different tools you can use to accomplish this, like a spade or a rotary. Create a crisp line to separate your garden and lawn and take out any grass growing in your garden.
  • Mulch. Now that your garden is planted and cared for, it’s time to add the final touch. Mulch will prevent weeds as well as help conserve water and keep the roots cool. It also completes the work you did to edge the garden and keeps grass out.

How can Steelcoat® help? We’ve got quality Trash Bags and Contractor Bags to help you when clearing up your garden. Our Low Density PE Plastic Sheeting can act as a weed barrier and moisture trap when laid in your garden before planting and mulching or can cover any materials and keep messes off your lawn as you replant your garden. Don’t forget, next week we’ll be walking you through how to keep your gutters clean. Follow us at Steelcoat Products to see all our updates.

How to Care for Your Lawn After Winter

petoskeyplastics DIY Advice, Home Improvement, Seasonal

Getting your lawn ready for warm weather can feel daunting, so we’ve broken down each step to make it a little more straightforward. Before you get started, remember that all yards are different and can require distinct care and products. We do recommend researching specific care tips for your type of grass and climate.

Here are nine steps to get you on your way to a lush lawn.

  1. Pick up debris. Once the last of the snow has melted away, go through your yard, and pick up any branches or litter that may have gotten trapped all winter under snow piles.
  • Lightly rake. On your first rake-though be gentle with your grass. It is easy to accidentally rip the blades out of the soil when it is wet. To avoid damage, give your yard a quick brush. Light raking will help it breathe and promote growth.
  • Check for mold. Once your yard has been cleaned up, check for any molds that might have grown since the fall. Snow mold is a common mold that appears as pink or gray spots throughout your yard. As you may have guessed, this sometimes happens to yards after heavy winters. Snow mold is dealt with by gently raking it to give healthy grass room to grow. If you notice other molds, do your research or contact a lawn care professional before treating anything. You will want to deal with any molds before moving forward.
  • Rake again when dry. Once you’re sure the ground has completely thawed and the soil is not too wet, you can rake your yard as normal. Focus on clearing matted grass to avoid suffocating new growth.
  • Aerate. Aerating your lawn is a good way to give it a boost in the spring. Aeration is the process of penetrating the soil to allow air and water to reach the grass roots and help them grow. This step is something you may want to give extra consideration if your grass and soil are compacted. Aerating does not need to be done yearly, but it can lead to better grass health.
  • Seed. Re-seed any parts of the lawn that are bare or patchy. Make sure to be attentive to these areas to make sure the grass is growing properly. This process takes around five weeks.
  • Fertilize. Fertilizing gives your grass a good dose of nutrients. Keep in mind that every yard is different. The best time to fertilize and the best type of fertilizer is something you’ll need to research before buying anything for your lawn. You will also want to be mindful of when you last fertilized; you may not need to add more.
  • Water on a schedule. Typical grass types need 1.5 in of water per week. You don’t need to water your yard every day, but it is a good idea to set a schedule to make sure your grass is getting enough moisture. You’ll need to take into account any rainfall throughout the week and adjust your watering schedule accordingly. Watering your lawn in the morning is usually recommended for optimal results.
  • Mow. Before you get to mowing, make sure your lawnmower is ready to go. Do any tuning up or repairs necessary before your grass gets too long. When deciding when to mow, you’ll need to find out what type of grass you have. Research the best length to keep your type of grass and when to cut it.

How can Steelcoat® help? We’ve got quality Trash Bags and Contractor Bags to help you when clearing up your yard. Don’t forget, next week we’ll be walking you through how to prepare your garden for spring. Follow us at Steelcoat Products to see all our updates.